
How Do You Prevent Roof Leaks From Solar Panels?
Last Updated: October 30, 2026
Quick Summary
Roof leaks solar panels usually come from poorly sealed mounting points, not the panels themselves. Prevent them by inspecting the roof before installation, using correct flashing at every penetration, sealing each bolt properly, and keeping written warranty and installation records.
- Most leaks start at mounting bolts that were poorly flashed or sealed.
- Check for existing leaks, cracked tiles and roof age before any panels go on.
- Ask the installer how each penetration will be flashed and sealed before work starts.
- Replace an aging roof before installing solar if it is near the end of its life.
- Keep photos of every penetration and the workmanship warranty in writing.
Table of Contents
- Why Solar Panels Sometimes Cause Roof Leaks
- Roof Inspection Before Solar Installation
- Solar Panel Roof Mounting Methods by Roof Type
- How to Seal Penetrations and Install Flashing Correctly
- Signs of a Roof Leak Around Solar Panels
- Solar Panel Installation Roof Leak Warranty and Documentation
- Booking a Roof-Safe Solar Inspection With Sunfire Electrical
- Frequently Asked Questions
Solar panels should not cause roof leaks. When a leak does appear after installation, the cause is almost always a mounting point that was sealed badly or not sealed at all. Most leaks can be prevented during the planning and installation stages.
The good news is that leaks are preventable. Most come from a small number of causes, and each one has a clear fix.
Why Solar Panels Sometimes Cause Roof Leaks
Solar panels are fixed to the roof with brackets. Each bracket passes through the roofing material and into the structure underneath. Every one of those holes is a possible entry point for water. A leak forms when water gets past the seal at one of these points.
Roof penetrations and mounting hardware
Each mounting bolt creates a penetration. Done properly, the penetration is sealed with flashing and sealant so water runs off instead of soaking in. Done poorly, the hole sits open to rain.
Watch for these common problems:
- Bolts driven through tiles without proper flashing
- Sealant applied thinly or not at all
- Brackets placed where they break the tile's water-shedding line
- Holes drilled too large for the bolt
Poor installation and workmanship
Most leaks come down to workmanship, not the panels themselves. A rushed install, a missed seal or a bracket fitted at the wrong angle can all let water in. Ask your installer how each penetration will be sealed before work starts.
Roof Inspection Before Solar Installation
A good installation starts with a roof check, and that check needs to be more than a glance from the ladder. Learn what a solar installation involves in the South West before you commit to a roof check. Before any panel goes on, the roof structure should be confirmed as able to carry the system, and the roof covering should have enough service life left to justify covering it with panels.
Roof readiness checklist for homeowners
Use this list before you book an installation:
- Check for existing leaks, damp patches or stains in the ceiling, especially in the rooms below where the array will sit
- Look for cracked, slipped, broken or missing tiles, and for rusted or lifted metal sheeting
- Check the age of the roof covering, ask the previous owner, the builder or a roofer if you do not know
- Confirm the roof pitch and orientation suit the panel layout, and that shading from trees or nearby structures is understood
Judging roof age and remaining service life
The roof covering matters more than the panels. A common pattern is for homeowners to install solar on a roof that is already near the end of its life, then face the cost of removing and refitting the array when the roof needs replacing. As a rough guide:
- Concrete or terracotta tiles typically last several decades, but individual tiles crack and bedding and pointing deteriorate. A tiled roof that is 25-30 years old or more should be inspected by a roofer before panels go on.
- Colorbond and other metal sheeting can last decades, but fixings, washers and sealant degrade, and older roofs may have surface rust. Check screw condition and whether the sheeting still sheds water cleanly.
- Asphalt shingles have a shorter service life than tile or metal, and brittle or curling shingles are a sign the roof is near replacement.
If the roof is within a few years of needing replacement, it usually makes sense to replace it before installing solar.
What the installer should check that you cannot
A homeowner checklist is no substitute for an on-roof assessment, which a licensed roofer can provide. An on-roof assessment should check:
- The condition of the roof decking or battens beneath the covering, including any soft or rotted timber
- Whether the roof structure can carry the additional load of the array
- The condition of flashings, valleys, ridge capping and penetrations that already exist (vents, flues, skylights)
- Whether existing gutters and downpipes will cope with the changed runoff pattern
Ask for the findings in writing, as a short roof condition report with photos gives you a baseline to compare against if a leak appears later.
Solar Panel Roof Mounting Methods by Roof Type
The right mounting method depends on what your roof is made of. Each material needs a different approach to keep water out.
Tile roofs and tile fit
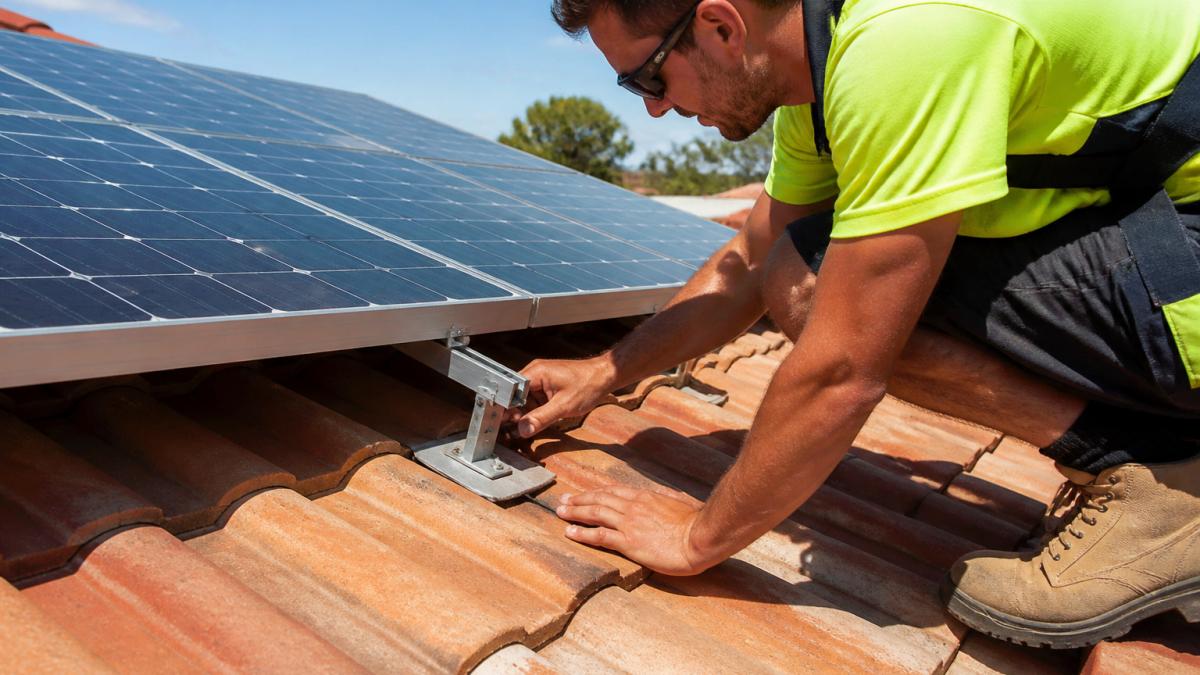
Tile roofs need careful handling. The mounting bracket usually sits under the tiles, and the bolt passes through the tile's water-shedding area. Poor tile fit is one of the most common causes of leaks on tiled roofs.
Metal roofs and sheeting
Metal roofs usually use clamps or brackets that attach to the ribs or sheeting, sometimes without drilling through the sheet. Where bolts do pass through the metal, they need a rubber or neoprene seal. Check that fixings are tight and that the seal has not cracked over time.
The right mounting method depends on the roof material, and each type needs its own approach to keep water out.
| Roof type | Mounting approach | Leak risk to watch |
|---|---|---|
| Tile roofs | Bracket under tiles, bolt through the water-shedding area | Poor tile fit |
| Metal roofs | Clamps or brackets on ribs or sheeting | Cracked rubber or neoprene seal where bolts pass through |
How to Seal Penetrations and Install Flashing Correctly
Flashing and sealant are the main defence against leaks at every mounting point. Good flashing directs water away from the hole. Sealant fills gaps and prevents water from creeping in around the bolt.
Follow these steps for a sound seal:
- Clean the area around each penetration before fitting
- Fit the flashing so it sits under the tile or sheet above and over the one below
- Apply sealant to the bolt head and the flashing edge
- Tighten the fixing to the correct torque, without overtightening
- Check that the flashing lies flat and water runs off the seal
Signs of a Roof Leak Around Solar Panels
Catch a leak early and the repair is simple. Leave it and water can damage the roof structure and ceilings below.
Look out for these warning signs:
- Water stains on ceilings, especially near the panel array's position
- Damp patches or mould in the roof space
- Dripping or water pooling after rain
- Cracked or lifted flashing around mounts
If you spot any of these, stop and get the roof inspected. Do not attempt roof repairs near live panels without professional help, because the electrical system adds risk.
Solar Panel Installation Roof Leak Warranty and Documentation
Knowing who is responsible if a leak happens is as important as preventing the leak. Read what each warranty covers for your solar system to see which one applies to a leak. Solar installations can sit across several separate warranties, and a leak can fall between them if the paperwork is unclear.
The three warranties that can apply
- Workmanship warranty, covers the installer's labour and the quality of the mounting, flashing and sealing. This is the warranty most likely to respond to a leak at a penetration. Ask for the term in writing and what it excludes.
- Product or equipment warranty, covers the panels, inverter and mounting hardware against manufacturing defects. It rarely covers a leak caused by installation, but it may cover a failed flashing component or a cracked mounting bracket.
- Roofing warranty, if a licensed roofer carried out tile work or sheet work, or if the roof covering itself is still under a builder's or manufacturer's warranty, that warranty may apply to the roof material around the penetration.
A common pattern is for the installer to attribute the leak to the roof and the roofer to attribute it to the mounting. Clear documentation is what resolves that dispute.
Documentation to collect before and after installation
Ask for and keep:
- The installer's workmanship warranty document, including the term, what is covered and the claims process
- The panel, inverter and mounting hardware warranties from the manufacturer
- A penetration schedule or diagram showing where each mount is and how it was sealed
- Photographs of each penetration before and after flashing and sealing
Keep these with your property records. If you sell the home, the next owner will need them, and some warranties are transferable.
What to do when a leak appears
- Do not walk on the roof near the array. Panels carry live DC voltage during daylight and the roof surface around mounts may be damaged.
- Photograph and date the leak, ceiling stains, damp patches, and any visible water entry point from inside the roof space.
- Contact the installer first if the leak is at or near a penetration and the workmanship warranty is still current. Put the request in writing and keep a copy.
- Contact your insurer if there is significant water damage to ceilings or contents, and tell them a solar array is on the roof.
- Get an independent roof report if the installer disputes responsibility. A licensed roofer's written assessment is useful evidence.
Questions to ask before you sign
- What is the workmanship warranty term, and does it cover leaks at penetrations?
- Who carries out any tile or sheet work, the installer or a licensed roofer?
- Will I receive photographs of every penetration?
- What is the claims process, and what response time do you commit to?
- Is the warranty transferable if I sell the property?
Sunfire Electrical backs its installations with a 10-year installation warranty. Keep your installation records safe.
Booking a Roof-Safe Solar Inspection With Sunfire Electrical
Preventing roof leaks starts with a proper inspection before any panels are fitted.
If you are weighing up a system, you can also review our 6.6 kW solar system package.

Ready to take the next step? Get A Free Quote and let our team check your roof before any work begins.
Frequently Asked Questions
How can you prevent roof leaks from solar panels?
Most leaks come from roof penetrations rather than the panels themselves. Start with a roof inspection before installation to check the age and condition of the roof covering. Make sure every mounting point is sealed with correctly fitted flashing, and that bolt holes are sealed to manufacturer specifications. Routine checks of mounts and flashing each year catch small problems before they become leaks.
Can solar panel installation cause a roof to leak?
Yes, if the installation is poor. The most common causes are drilled holes that were not sealed, flashing fitted under the wrong tiles, or brackets tightened so hard they crack a tile or sheet. Leaks can also appear where a roof was already ageing and the installation disturbed weak areas. A competent installer will assess the roof first, use the correct flashing for the roof type, and document each penetration so any later fault can be traced.
How do you know if a roof leak is coming from solar panels?
Look for water staining or drips directly beneath or downhill of a mounting bracket, particularly after rain driven by wind. Check the ceiling below the array for marks that line up with the panel rows. Look at the roof space for wet battens, rafters or insulation near the penetrations. If you suspect a leak, switch off the system if there is any sign of water near electrical equipment and contact a licensed electrician before touching the array.
What should you do if your roof leaks after solar panel installation?
First, protect the interior with buckets and towels, and photograph any staining. Do not climb onto the roof or remove panels yourself. Contact the installer and check your warranty and installation paperwork.
