
Solar Panel Installation South West WA: What to Expect?
Last Updated: October 29, 2026
Quick Summary
Solar panel installation in South West WA follows a clear path: a site inspection and shading check, a system size matched to your daytime usage, Western Power pre-approval, then a single installation day. A 6.6 kW grid-tied package from Sunfire Electrical starts from $3,588 for single-phase homes, including Tier 1 panels, an inverter and full installation.
- Shading should be mapped across seasons, not just on the day of the site visit.
- No system can be energised until Western Power pre-approval is granted in writing.
- Installation usually takes one day for a standard residential system.
- Sunfire Electrical backs its work with a 10-year installation warranty.
- Self-consumption is the biggest lever on your solar payback period.
Table of Contents
- Solar Panel Installation South West WA: How the Process Works
- Step 1: Site Inspection and Shading Assessment
- Step 2: Choosing the Right Solar System Size for Home
- Step 3: Approvals, Grid Connection and Regulatory Requirements
- Step 4: Installation Day and Roof Protection
- Residential Solar Installation Cost WA and Your Solar Payback Period South West WA
- Your Solar Quote Checklist Before You Sign
- Common Mistakes to Avoid with Solar Panel Installation
- Frequently Asked Questions
Solar Panel Installation South West WA: How the Process Works
Solar panel installation south west WA follows a clear path: a site inspection and shading check, a system size that matches your usage, grid approval, then a single installation day. This guide sets out what each stage involves, what it costs, and where quotes usually go wrong.
The South West is well suited to solar. Long summer days, a coastal breeze that keeps panels cooler, and high household electricity use all help a system earn its keep.
Below, we walk through each step in order, so you know what to expect before anyone climbs on your roof.
Why the South West Suits Solar
The region gets strong, consistent sunlight across most of the year.
What You'll Need Before Installation
Have these ready before the site visit:
- Recent electricity bills showing quarterly usage in kWh
- A rough idea of your daytime usage, especially air conditioning
- Roof access details, including any fragile or tiled sections
- Your switchboard location and age
- Any planned additions, such as an electric vehicle or battery
Here is the installation path at a glance, from the first roof check to switch-on.
| Stage | What happens | Key point |
|---|---|---|
| Step 1: Site inspection | Roof, switchboard and shading check | Shade mapped across seasons, not just visit day |
| Step 2: System size | Size matched to daytime usage and roof space | 6.6 kW package from $3,588 for single-phase homes |
| Step 3: Approvals | Western Power pre-approval before equipment is ordered | No energising until approval is granted |
| Step 3: Meter change | Retailer arranges the meter upgrade | Separate from the network operator |
| Step 4: Installation day | Rails, panels, cabling, inverter, testing | Usually one day for a standard residential system |
| Warranty | Written installation warranty | Sunfire Electrical backs work with 10-year warranty |
Step 1: Site Inspection and Shading Assessment
A site inspection is a physical check of your roof, switchboard and shading before any design work starts. It confirms whether your roof can carry the panels, where the sun hits through the day, and whether your switchboard needs an upgrade.
Shading is the part most homeowners underestimate. A single tree branch across a panel in the morning can cut output for that whole string. A proper assessment maps shade across seasons, not just at the time of the visit.
Watch out: skipping the inspection and buying from a quote based on satellite images alone often leads to a system that underperforms or needs rework.
Step 2: Choosing the Right Solar System Size for Home
The right solar system size for home depends on your daytime usage, roof space and budget, not on a generic rule. A 6.6 kW system is one of the packages Sunfire Electrical offers, and it is designed for single-phase homes.
A 6.6 kW grid-tied package from Sunfire Electrical starts from $3,588 and includes Tier 1 panels, an inverter and full installation by accredited electricians. It is designed for single-phase homes.
You can compare current solar packages and pricing or view the 6.6 kW system in detail to see what fits your home.

Before you commit, check three things:
- Your average daily usage in kWh
- Whether you plan to add a battery or an EV charger later
- How much north or west-facing roof space you have
Step 3: Approvals, Grid Connection and Regulatory Requirements
Grid connection approval comes before installation, not after. Your installer submits an application to the network operator, and the system cannot be energised and connected until that approval is granted. The retailer you buy electricity from is a separate party and does not approve the connection.
A typical sequence is:
-
Pre-approval application, lodged with Western Power before equipment is ordered. It sets the approved inverter capacity and any export limit for your address.
-
Installation, carried out only after pre-approval is granted.
-
Meter change, your retailer arranges the meter upgrade so the system can be read and credited for exports.
-
Connection and commissioning, the system is switched on and tested, and you receive handover documentation.
Export limits are the most common surprise. A limit does not stop you installing solar; it caps how much you can send to the grid, which changes the payback maths if you were counting on feed-in income.
Your installer should be able to show accreditation and licence numbers on request.
Ask these questions before signing:
- Who lodges the Western Power application, and will I receive a copy of the approval?
- What export limit applies to my address, and is it the default or a constrained-area limit?
- Who arranges the meter change, and is the cost included in the quote?
- Are there any local council or heritage requirements for my property?
- What happens if the network approves less capacity than the quote assumed?
A written approval with your address and approved capacity on it is the document to ask for. If an installer cannot produce one before installation day, that is the point to pause.
Step 4: Installation Day and Roof Protection
Installation usually takes one day for a standard residential system. The crew mounts rails, sets the panels, runs cabling and connects the inverter, then tests the system before handover.
Roof protection is where cheap installers cut corners. Flashing must be sealed properly around every mount point, and cables need to be clipped and protected from UV and weather.
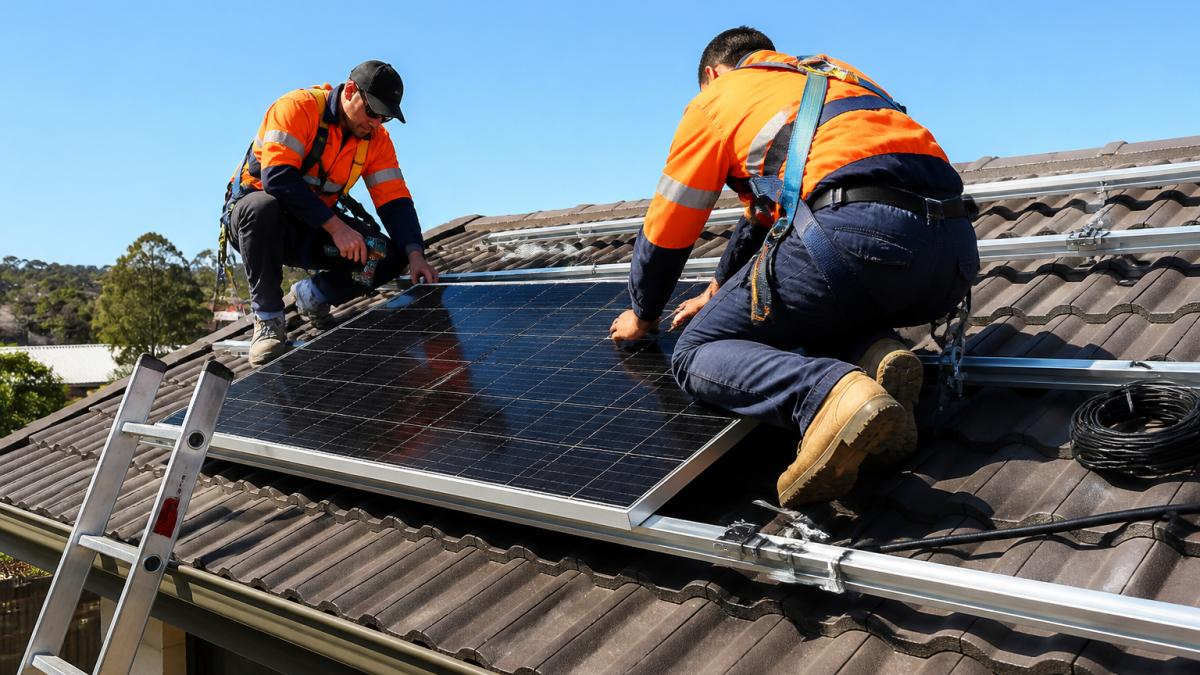
Ask your installer how they seal penetrations and whether the work is covered by a written installation warranty. Sunfire Electrical backs its work with a 10-year installation warranty.
Residential Solar Installation Cost WA and Your Solar Payback Period South West WA
Residential solar installation cost WA homeowners face depends on system size, equipment and roof complexity. Ask whether the price you are quoted is before or after any government rebate.
The upfront price is only half the story. Payback is the time it takes for bill savings to equal what you paid, and it moves with three inputs:
- Self-consumption, the share of solar you use in the home rather than export. This is the biggest lever. Every kilowatt-hour you use behind the meter is worth your full retail rate; every kilowatt-hour you export is worth only the feed-in rate.
- Tariff and feed-in rate, your retail rate and the feed-in rate your retailer pays for exports. The gap between them is why daytime usage matters so much.
- Upfront cost and system size, a larger system costs more but produces more, so the payback can be similar or shorter if the extra output is used.
If you want to shorten the timeline, read our practical guide to reducing electricity bills before you size your system. If a battery is likely within a few years, a battery-ready hybrid inverter costs more upfront but avoids a second installation later, and the payback should be judged over the life of both assets rather than the panels alone.
When you compare quotes, ask each installer to state the price after rebate, the assumed self-consumption, and the feed-in rate used in any savings estimate. A payback figure without those assumptions is a guess, not a calculation.
Your Solar Quote Checklist Before You Sign
Use this checklist to compare quotes on equal terms:
- Itemised panel and inverter brands and models
- System size in kW and estimated daily production
- Installation warranty length and what it covers
- Panel and inverter warranty terms in writing
- Who handles network approval and meter change
- Roof penetration sealing method
- Accreditation numbers for the installers
Warranty terms are the most overlooked line. Read the plain-English guide to solar panel warranty coverage so you know what is protected and for how long.
When you are ready to compare options, contact the team for a free quote.
Common Mistakes to Avoid with Solar Panel Installation
The biggest mistake is buying on price alone. A cheap system with a short installation warranty often costs more over its life than a well-installed one.
Other common errors:
- Sizing the system on bill total rather than daytime usage
- Ignoring future battery or EV plans
- Not checking who lodges the grid application
- Skipping the shading assessment
- Failing to confirm what the installation warranty actually covers
Without model numbers, you cannot compare two quotes fairly.
Frequently Asked Questions
How do I choose a solar panel installer in South West WA?
Check for Solar Accreditation Australia (SAA) accreditation, a fixed business address, and a written installation warranty. Ask how long the company has operated locally and whether the installers are employees or subcontractors. Request a site inspection before any quote, and confirm the quote lists panel and inverter models by name. A 10-year installation warranty, like the one Sunfire Electrical provides, is a useful benchmark for judging long-term accountability.
How much does residential solar panel installation cost in South West WA?
A fully installed 6.6 kW grid-tied system from Sunfire Electrical starts at $3,588, including Tier 1 panels and a Solar X1 G4 Boost inverter on single phase. Larger off-grid packages with battery storage start at $17,771. Prices vary with roof type, switchboard condition and network operator limits, so ask for a custom quote and yield estimate rather than relying on a headline figure.
How can I estimate the solar payback period for my home?
Divide the installed cost by your annual bill savings. Sunfire Electrical's 6.6 kW package is listed as saving up to $2,000 per year, though actual savings depend on your tariffs, usage pattern, panel orientation and network limits. Ask your installer for a yield estimate based on your last four electricity bills before you commit.
Should I choose a grid-tied or battery-ready hybrid solar system?
Grid-tied suits most suburban homes with a reliable connection and daytime usage. A battery-ready hybrid system costs more upfront but lets you add storage later without replacing the inverter, which suits households planning for an electric vehicle or evening-heavy usage. Sunfire Electrical specialises in both grid-tied and battery-ready hybrid systems, so ask which suits your usage profile.
Solar is a long-term purchase, and the difference between a good and a poor installation shows up years later. Sunfire Electrical is Australian owned and operated, specialises in grid-tied and battery-ready hybrid systems, and backs every install with a 10-year installation warranty. Get started with Sunfire Electrical and lock in a system sized for your home, your usage and your plans.
